How to get a drop down to change axes? I thought this would work but I don't understand why not

I’m trying to make a graph where the axes can be changed through drop downs, just like what’s shown in the crossfilter example in the gallery, except not using the Bokeh server.

I’ve created something and I can’t figure out what I’m doing wrong. I’ve set the x value to be the value of a select widget, but when the value in the select widget is changed the graph doesn’t update, and I don’t understand why.

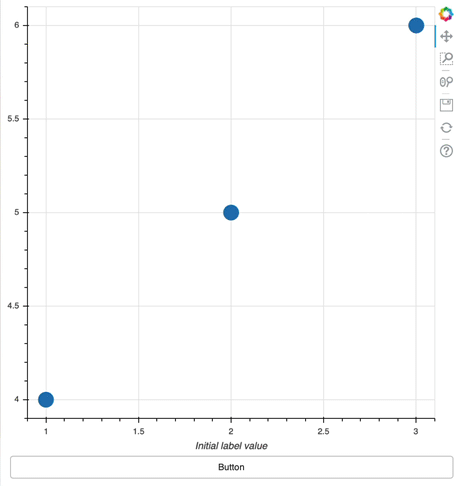
There’s a .js_on_change for the widget, and the graph correctly interprets the initial value set. Perhaps it’s something to do with the select widget referring to strings, not the values in the source (if so it’d be great to know how to change this).

Here’s my code simplified down which demonstrates the issue:

from bokeh.plotting import figure, show
from bokeh.models import CDSView, ColumnDataSource, CustomJS
from bokeh.models.widgets import Select
from bokeh.layouts import column, layout
data = dict(Apples=[97, 34, 23, 6, 26, 97, 21, 92, 73, 10, 92, 14, 77, 4, 25, 48, 26, 39, 93],
Bananas=[39, 28, 61, 43, 10, 95, 40, 73, 96, 85, 49, 14, 28, 90, 47, 59, 89, 64, 86],
Not_Cancelled=[87, 63, 56, 38, 57, 63, 73, 56, 30, 23, 66, 47, 76, 15, 80, 78, 69, 87, 28],
OnTime_Arrivals=[21, 65, 86, 39, 32, 62, 46, 51, 17, 79, 64, 43, 54, 50, 47, 63, 54, 84, 79])
source = ColumnDataSource(data=data)
Axesselect = Select(title=“Option:”, value=“Bananas”, options=[“Apples”, “Bananas”, “Not_Cancelled”, “OnTime_Arrivals”])
Axesselect.js_on_change(‘value’, CustomJS(args=dict(source=source), code=“”“source.change.emit()”“”))
view = CDSView(source=source)
p = figure()
p.circle(Axesselect.value,‘Not_Cancelled’, source=source, view=view, size=20)
controls = [Axesselect]
inputs = column(*controls, width = 300)
l = layout([[inputs, p]], sizing_mode=“stretch_both”)
show(l)

Could someone please point out what super basic thing I’m probably overlooking and doing wrong?

And thank you so much for all the help! Great to see such a supportive community for Bokeh. I’m having a great time building such cool stuff!

Hi tvkyq!

I think the main issue is that no change is actually happening in the callback. Your js code is source.change.emit(), and that’s running like it’s supposed to, but there were no changes to source so there’s really nothing to emit.

I checked on the code in that example from the gallery. What’s happening there is that a new figure is being created on every update. You could do that, but I wanted to pursue the angle of how you’d change the existing one.

Typically in a callback situation, the glyphs (like your p.circle) have their data source (yours is the ColumnDataSource called source) and columns (e.g. ‘Not_Cancelled’) they’re looking for, and when an update occurs, the data source is what’s updated, and the glyphs fall in line.

One way I propose making this work (and this is only one way, you could approach it differently) is adding a column to your CDS, called something like ‘active_axis’, and have your callback change what’s in that column (copying it from the Bananas column, or Apples column, or whatever’s selected). The circle glyph can then use that as its x-values.

Here’s my revision of your code. Let me know if you have any questions about why any changes were made, or whether something could be done a different way!

from bokeh.plotting import figure, show
from bokeh.models import CDSView, ColumnDataSource, CustomJS
from bokeh.models.widgets import Select
from bokeh.layouts import column, layout

data = dict(Apples=[97, 34, 23, 6, 26, 97, 21, 92, 73, 10, 92, 14, 77, 4, 25, 48, 26, 39, 93],
        Bananas=[39, 28, 61, 43, 10, 95, 40, 73, 96, 85, 49, 14, 28, 90, 47, 59, 89, 64, 86],
        Not_Cancelled=[87, 63, 56, 38, 57, 63, 73, 56, 30, 23, 66, 47, 76, 15, 80, 78, 69, 87, 28],
        OnTime_Arrivals=[21, 65, 86, 39, 32, 62, 46, 51, 17, 79, 64, 43, 54, 50, 47, 63, 54, 84, 79]
       )
data['active_axis'] = data['Bananas']

source = ColumnDataSource(data=data)
view = CDSView(source=source)

Axesselect = Select(title="Option:", value="Bananas", options=["Apples", "Bananas", "Not_Cancelled", "OnTime_Arrivals"])
Axesselect.js_on_change('value', CustomJS(args=dict(source=source, Axesselect=Axesselect), code="""
  source.data['active_axis'] = source.data[Axesselect.value]
  source.change.emit()
  """))

p = figure()
p.circle('active_axis', 'Not_Cancelled', source=source, view=view, size=20)
controls = [Axesselect]
inputs = column(*controls, width=300)

final_layout = layout([[inputs, p]], sizing_mode="stretch_both")
show(final_layout)
1 Like

Hey carolyn this is AWESOME! After a bit of playing around it all works smoothly. Really nice stuff!

There’s one thing resulting out of this that I’m trying to figure out. In the more complex model I’m building the x_axis_label isn’t updating to what the Axesselect’s value is set to be. I’ve tried setting it as Axesselect.value, and that works when it’s initially loaded, but it seems to be static. And the Axesselect already has a js_on_change going, and the p.circle already has source = source, view = view…

Any ideas? And again thank you so much for all the help!

This surprised me also, and when I inspected the figure object in the javascript console, the labels didn’t seem to be available to modify. I’m not sure why that works the way it does, BUT there’s a workaround! See the answer posted by tuomastik here:

Basically, you’re making the original axis invisible, declaring a new LinearAxis object and tacking that on, and then the LinearAxis object is updatable via the callback. Callback ends up looking something like this (with p and its new LinearAxis declared beforehand, so they’re referenceable):

p = figure()

# hide standard axis; add new LinearAxis object
p.xaxis.visible = None
new_xaxis = LinearAxis(axis_label="Bananas")
p.add_layout(new_xaxis, 'below')

Axesselect = Select(title="Option:", value="Bananas", options=["Apples", "Bananas", "Not_Cancelled", "OnTime_Arrivals"])
Axesselect.js_on_change('value', CustomJS(args=dict(source=source, Axesselect=Axesselect, xaxis=new_xaxis), code="""
    source.data['active_axis'] = source.data[Axesselect.value]
    source.change.emit()
    xaxis.attributes.axis_label = Axesselect.value
    // in testing i found the change.emit on the xaxis in the original example to be unnecessary
    """))

Are you saying that this:

xaxis.axis_label = Axesselect.value

does not work in the CustomJS callback? The attributes part should not be needed.

You’re right, the attributes part is not needed, but this still only seems to work if we add our own LinearAxis. Here, I’ve reverted the code to try to update the plot’s original axis-- let me know if you see something off.

from bokeh.plotting import figure, show
from bokeh.models import CDSView, ColumnDataSource, CustomJS
from bokeh.models.widgets import Select
from bokeh.layouts import column, layout
from bokeh.models import LinearAxis

data = dict(Apples=[97, 34, 23, 6, 26, 97, 21, 92, 73, 10, 92, 14, 77, 4, 25, 48, 26, 39, 93],
            Bananas=[39, 28, 61, 43, 10, 95, 40, 73, 96, 85, 49, 14, 28, 90, 47, 59, 89, 64, 86],
            Not_Cancelled=[87, 63, 56, 38, 57, 63, 73, 56, 30, 23, 66, 47, 76, 15, 80, 78, 69, 87, 28],
            OnTime_Arrivals=[21, 65, 86, 39, 32, 62, 46, 51, 17, 79, 64, 43, 54, 50, 47, 63, 54, 84, 79]
           )
data['active_axis'] = data['Bananas']

source = ColumnDataSource(data=data)
view = CDSView(source=source)
p = figure(x_axis_label='Bananas')

# hide standard axis; add new LinearAxis object
#p.xaxis.visible = None
#new_xaxis = LinearAxis(axis_label="Bananas")
#p.add_layout(new_xaxis, 'below')

Axesselect = Select(title="Option:", value="Bananas", options=["Apples", "Bananas", "Not_Cancelled", "OnTime_Arrivals"])
Axesselect.js_on_change('value', CustomJS(args=dict(source=source, Axesselect=Axesselect, xaxis=p.xaxis), code="""
    source.data['active_axis'] = source.data[Axesselect.value]
    source.change.emit()
    xaxis.axis_label = Axesselect.value
    """))

p.circle('active_axis', 'Not_Cancelled', source=source, view=view, size=20)
controls = [Axesselect]
inputs = column(*controls, width=300)

final_layout = layout([[inputs, p]], sizing_mode="stretch_both")
show(final_layout)

Almost certain the issue here is passing p.xaxis. And that is because since there may be multiple x-axes, p.xaxis is actually a list of axes. It’s a special list, though, that attempts to “does the right thing” in the most common single axis case. We coined the term “splattable list”, for the way setting a property on it broadcasts the value to all the contents:

Anyway, TLDR, I think things would work if you explicitly pass a single axis, i.e. p.xaxis[0], instead.

1 Like

Tested-- and it does work! Thanks @Bryan! Have fun, @tvkyq!

Anyone want to leave a comment or edit the SO answer :smiley:

Hey guys thanks for the help! I’m a little embarrassed to say you’ve lost me here… I’ve tried running carolyn’s latest code and I can’t get it to work.

It looked like the code (without the apostrophe)

'# hide standard axis; add new LinearAxis object
#p.xaxis.visible = None
#new_xaxis = LinearAxis(axis_label=“Bananas”)
#p.add_layout(new_xaxis, ‘below’)

Might’ve been accidentally put in comments, but playing around with that didn’t work. It seems the new axis is added but the label doesn’t update. I thought that might’ve been because the JS code says xaxis.attributes.axis_label, which didn’t look like it corresponded to new_axis = LinearAxis(axis_label=“Bananas”) , but that didn’t work either.

Where should this p.axis[0] Bryan mentions in his TLDR be placed?

@tvkyq You don’t actually need a new axis or any of that complicated code, here is a complete minimal example for updating an axis label:

from bokeh.plotting import figure, show
from bokeh.layouts import column
from bokeh.models import Button, CustomJS

p = figure(x_axis_label="Initial label value")
p.circle([1,2,3], [4,5,6], size=20)

button = Button()

# p.xaxis is a list, must pass one actual axis, p.xaxis[0], here
callback = CustomJS(args=dict(axis=p.xaxis[0]), code="""
    axis.axis_label = "Updated label value"
""")
button.js_on_click(callback)

show(column(p, button))

ScreenFlow

1 Like

Maaate! That worked a dream! Thank you! All I had to do was include axis = p.axis[0] and write that after p is defined (duh). Amazing how easy something can be once you wrap your head around it!

Thanks again!

2 Likes

Glad we could help!